Registering metadata
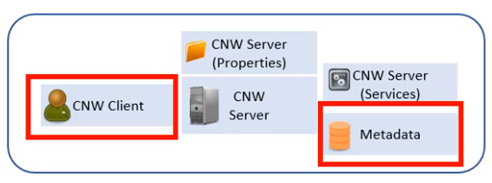
It's time to register the metadata. But first it's important to understand what this means. In the figure below, we've highlighted the Client and the metadata database.

When the Client accesses the Server to perform any operation, the Server needs to connect to the metadata database. The credentials for accessing this database are stored in the Properties directory, which has not yet been configured. In addition, it is necessary to create an ID identifier for the metadata in this directory.
This ID will be a crucial number, referencing specific metadata.
- Go to the directory where the product was installed and enter the Designer and Administrator directory.
- Search for the product's Client executable. Using PIS as an example, the file is PIS.exe. If you are using Metaware, Connware or Cerensa, the file will have a specific prefix for each product.
- To make it easier to access, right-click on this EXE and select Copy.
- On your machine's Desktop, Paste it as a Shortcut.
- To use this shortcut easily, right-click on it, go to Properties, then Advanced, and select Run as administrator.
- You can change the name of the shortcut if you wish.
- Now run the shortcut by double-clicking on it.
- When you open the client for the first time and access a machine without metadata records, a message will appear indicating that there are no schemas registered in the metadata record directory.
- Click OK and access the main menu under Manager, Schema, where the metadata will be registered.
- To create a metadata, simply fill in the name of the schema. For example, Course Metadata, and click New to save the schema.
- Click Close and the system will ask if you want to save the schemas. Confirm that you do.
The schemas are saved.
Log-In - Schema Manager (4.6.6.4)
On the schema log-in screen (Metadata), the important options on the toolbar include:

Open: Searches for a list of schemas saved in an external file.
Save: Saves the schema configuration list to an external file.
Save One: Saves only the selected schema to an external file.
Close: closes the editing dialogue box for the schemas saved in the client's user directory.
New: Saves a new schema.
Update: Updates an existing schema.
Clean: Clears data from a schema.
Delete: Deletes schema records.
Scripts: Visualises the schema data in JSON format.
Download Schemas: Downloads the schema configuration from the server.
Save schema in WebService site: Saves the schema configuration on the server.
Schema properties:
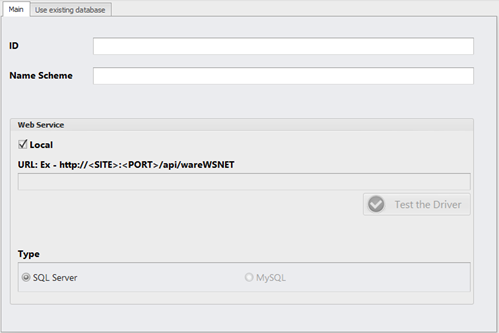
Main tab.

Id: Schema identifier. If left blank, a random ID will be created.
Name Schema: Name of the schema.
Local: If ticked, the metadata will be accessed directly. Used when all product components are on the same machine. If unchecked, access will be via client server.
URL: URL where the server is located.
Test the Driver: Tests server access via URL.
Type: Type of metadata management database.
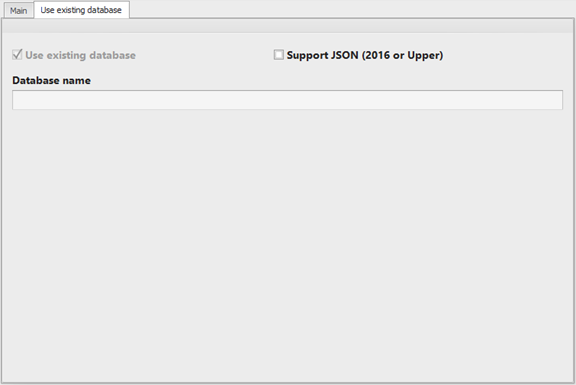
Use existing database tab.

Support JSON (2016 or Upper): Tick this option if the metadata's SQL Server is version 2016 or higher.
Database name: Database name. Option disabled.