* Transformation Dialog box
Understanding the Transformation Dialog Box Version 4.6.6.6
The Transformation Dialog Box in PIS encompasses a comprehensive array of familiar icons within its Toolbox, including Open, Save, New, Update, Clean, and Delete, among others. On the main tab, named "Main," users input the transformation's name, descriptor, and associated provider, with the option to activate the transformation by checking the "Active" box located to the right of the screen. In the "Source" tab, users select the container serving as the transformation's source using the "Object" and "Edit" buttons.


The "Object" button enables the selection of any container within the model, while "Edit" allows users to edit the selected object, confirm its selection, or choose another object of the same type. In the "Transformations" tab, users find most of the information necessary for creating a transformation. Each row in the grid represents a transformation applied to the source displayed on the screen.
The source data undergoes the first transformation listed vertically, followed by subsequent transformations. Horizontally above, users find the Toolbox affecting the transformations. Included are buttons for adding a new transformation, modifying an existing one, copying a transformation, deleting a transformation, previewing up to the selected point, two buttons to change the order of transformations, and three final buttons for copying, pasting transformations within the model, or clearing selections from memory.

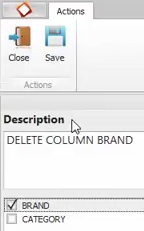
Clicking beside the "New Transformation" button reveals a series of existing standard transformations. While not delving into the specifics of each transformation at this juncture, those utilized in the tutorials are mentioned. For instance, the first transformation facilitates column deletion.

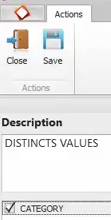
Clicking "Edit" reveals an area where users describe the transformation and select the columns for deletion. The second transformation seeks distinct values, with an area for description creation and selection of columns to display only unique values.


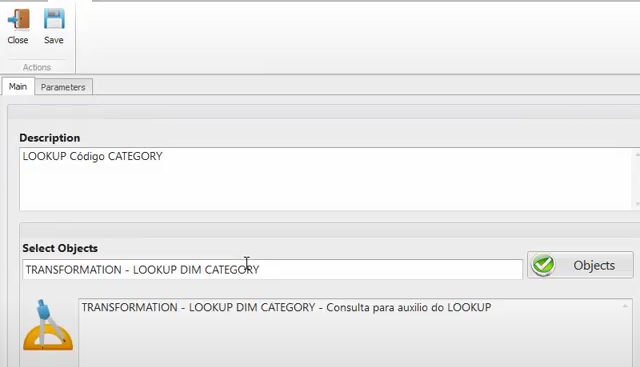
Another transformation is the "lockup," detailed in previous videos regarding its logic. In the "Main" tab, users select the search object where the lockup will be applied. Here, a container cannot be selected, but rather a transformation is chosen.

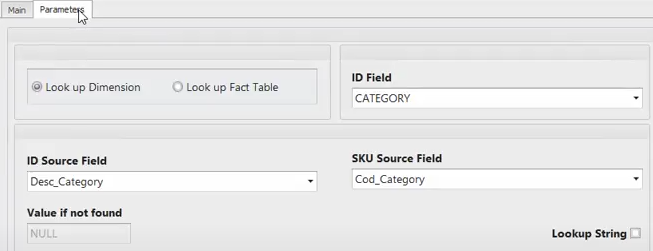
In the "Parameters" tab, users find information pertaining to the lockup. They select whether to perform a dimension or fact lockup. The logic explained in previous videos pertains to dimension lockup.

The field in the source serving as the search criterion in the lockup table is specified. In "IDSourceFields," the corresponding field in the destination table (i.e., the lockup table) is selected. Lastly, the field receiving the encoding is designated.
Users can also create string lockups. The transformation's progression can be monitored line by line. For example, selecting the first transformation and clicking "Preview" in the transformations toolbox displays the transformation's result applied only to the selected transformation.
Selecting "Distinct Values" and clicking "Preview" shows the result of the transformation after applying it to the first and second lines. Selecting the third line, which is the lockup, displays the result of the transformation applied to the first three existing transformations. Clicking the last line shows the final result after applying all transformations.
In the "Preview" tab, users find all buttons previously presented in the container preview: listing the preview, filtering the result, navigating the preview result, selecting metadata, and viewing statistics.