* Automatic Dialog Box
Understanding the Automatic Box dialog, version 4.6.6.6.
The narrator proceeds to elaborate on the functionalities and interface elements of the Automatic Box dialog. The toolbar on the left-hand side consists of several icons, the first seven of which correspond to familiar functionalities found in other components.

Adjacent to these icons is the Productivity icon, facilitating the inclusion of the Automatic Box within a Flow, although the tutorial has yet to introduce the Flow component. Following this is the option to list the Automatic Box either by list or by provider.

Next, there's the icon allowing the execution of the data transfer process, followed by the Refresh operation, which updates the list of Automatic Box objects. Adjacent to this is the Command button, enabling the execution of the Automatic Box as a command-line operation within the operating system.

Further along is the List Object button, facilitating the listing and organization of components based on various search criteria. Additionally, there's the Script button, allowing observation of the component in JSON format. This feature provides a representation of the Automatic Box solely in JSON format.

Next is the Documentation button, which, upon selection, presents documentation of the created component. Lastly, the Refresh Objects button allows for updating all Automatic Box objects using the current Metadata version.

The Automatic Box dialog comprises several tabs. Under the Main tab, users can find the Automatic Box's name, descriptor, and Provider, alongside a checkbox enabling activation or deactivation of the Automatic Box. Below this is the Fast Engine feature, designed to expedite data transfer between source and destination, particularly useful for large volumes of data.

Moving to the Connection tab, users specify the source and destination connections to be used for data transfer. Here, they select the driver types rather than specific drivers.

The Source tab determines the source container, while the Target tab designates the destination driver, which must be associated with the chosen destination connection.

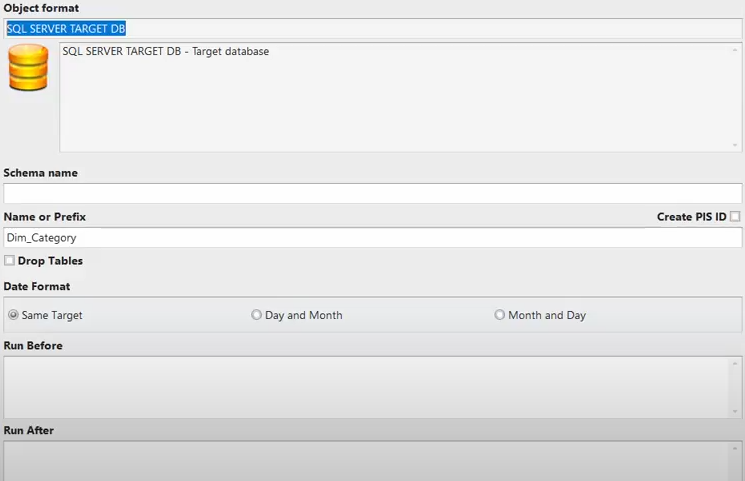
Within the Target tab, the Properties button configures properties related to the repository where the data will be written, such as the database schema name, table name, and options like dropping the table before writing, DateTime or Date field formats, and pre- or post-execution SQL commands.


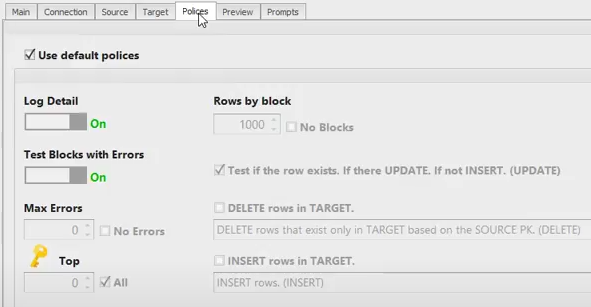
The Policies tab governs data writing policies, with various combinations to be addressed later. The Default combination entails replacing existing records and inserting new ones if they don't already exist in the destination table. Notably, if the destination table doesn't exist, the Automatic Box will create it using the existing container metadata settings.

The Preview feature allows users to preview how data will be written to the destination, although it isn't utilized when the destination is SQL Server. Finally, the Prompt tab, although to be explored in more detail later, pertains to variables enabling more dynamic programming of processes.
The narrator concludes by expressing gratitude and anticipation for the next video.