Creating a directory and installing SERVER 32
Version 4.6.6.4
Please note: Whenever you see the version above in this text, it means that this section of the text has been configured using the version mentioned above. If you are using a version lower than this for a practical exercise, ask for the most up-to-date version to be made available. If it's a version numbered the same or higher than this one, you can proceed.
Start the installation and configuration of PIS with the following steps:
- Defining the Installation Directory and
- Installing Server 32.
The choice of Installation Directory is crucial for several reasons. Here, I'll share a best practice for everyone to adopt when installing a PIS.

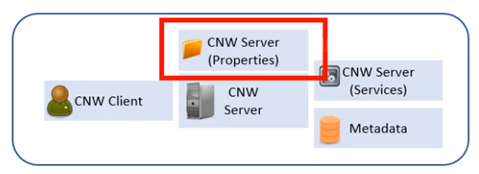
Firstly, let's remember the Properties component, mentioned earlier. This directory, named Properties, stores all the log configurations, metadata records, licences, audit files, and other elements related to the server. This directory tends to grow in size. By default, PIS is installed in the Program Files directory, and creates the Properties directory in C:\ProgramData. However, a server's C drive usually has limited capacity. Therefore, I recommend creating a dedicated directory in a place with more space, where both the product and the Properties directory can be configured.
Regarding Server 32, it's important to note that PIS is a 64-bit tool. However, you may need to connect to databases via 32-bit ODBC drivers. For this reason, installing Server 32 is recommended, even if you don't immediately need connections with 32-bit drivers, as it takes up little space and can prevent possible errors in the environment.
Then select the drive of best choice in your case. Then proceed:
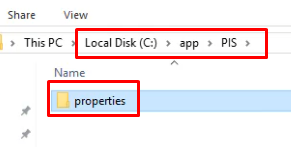
- Create a directory called app.
- Under app create a subdirectory named according to the product. In the case of this tutorial, we'll use the PIS directory. But you may be following this tutorial with another product. So use the acronyms MWH for Metaware, CNW for Connware and CER for Cerensa Integrator.
Under the directory representing the product, create the Properties subdirectory.

Install Server 32. To do so:
- Navigate to the directory of the installation files.
- Unzip the SERVER32 file.
- Run the installer as an administrator.
- Click NEXT.
- In the Installation Folder tab, replace it with the directory you created, in this case, c:\app\PIS.
- Click INSTALL.
After installation, SERVER32 will be available in the directory, in this case, c:\app\PIS.